Creating suite modules
Introduction
In this part of the tutorial, you'll do the following:
Create the suite module
Suite Modules are independent of applications because they are building blocks that could be used in other apps or modules.
You can use a grouping folder to hold suite modules that are related to each
other, i.e the suite framework team has the suite grouping folder to define
low level features.
Warning
Suite 3.0 team not recommends to use the name of the app as grouping folder for suite modules. If you need help to define the where to put your module use the Q&A channels to ask.
To make this structure easy to create the suite team offers workspace generators to create suite modules. i.e:
yarn nx workspace-generator suite-module some-amazing-feature
For this tutorial, we need something smaller than the complete suite module, we need an easy way to define mutations, queries, lists and forms. In this case the framework offers other way to create a minified version of a suite module focus on CRUD operations
Creating CRUD modules
We need to create the equipment modules that needs a list, a form to create
the equipment and the domain layer to communicate the ui with the service.
yarn nx workspace-generator suite-crud-module equipment
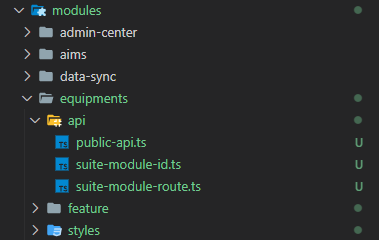
Routing configuration
By default, suite modules are configured to be used with lazy loading and routing.
Each suite module includes a module ID in the suite-module-id.ts file and a
function which returns an Angular Route
in the suite-module-route.ts file.
This function can be used in any application or suite module. In this
case the equipment module will be used with EMA, the application created in
this tutorial.
Suite pages
By default the suite module generator includes a list page and a form page we are going to use them as an starting point.
Equipment's list page
As you know, the list page effect is one of the auto-generated files, but remember to configure this file changing the name of the class, the query , idField and else. At the end the class should look like this:
Equipment's creation page
Info
To create a creation form page follow this guide
Connect the list with the creation page
last but not least, is time to configure the list in order to connect both features with a button.
- To add a list button we need to create an action.
| TypeScript | |
|---|---|
- Once the action has been created, we must configure the list to display a
button using the
addToolbarActionfunction.
Equipment's edition page
Info
To create an edition form page follow this guide
Connect the list with the edition page
After creating the new form page we need to configure the list in order to connect both features with a button located in each line/card.
- To add a list button we need to create an special action that includes the equipment.
| TypeScript | |
|---|---|
- Once the action has been created, we must configure the list to display a
button using the
addListActionfunction.
Complete CRUD configuration
Once all the pages have been configured the result should be a module like this one:
good practices
- Remove unused files and unused tests. i.e: ui component tests or feature component tests.
- Each suite module has multiple libraries. Export only the things that you want to expose.
- Follow the style guide.